
Overview of Installation
I will be downloading and installing MinGW 64-Bit.
The recommended way of installation is through MSYS2 and it’s package management system Pacman.
This is a full example of setting up MSYS2. If you would prefer a more succinct guide, please check out my overview.
Installing MSYS2
What is MinGW?
MinGW stands for Minimalist GNU for Windows. MinGW-w64 is a fork from the original MinGW project. From MinGW’s own description, it should be noted that “MinGW, being minimalist, does not, and never will attempt to provide a POSIX runtime environment for POSIX application deployment on MS-Windows.”
What is MSYS2?
From their webpage, MSYS2 is a software distribution and building platform for Windows.
At its core is an independent rewrite of MSYS, based on modern Cygwin (POSIX compatibility layer) and MinGW-w64 with the aim of better interoperability with native Windows software. It provides a bash shell, Autotools, revision control systems and the like for building native Windows applications using the MinGW-w64 toolchains.
Note about my in-depth guides
To compliment my “how to” overview, I always like to provide a more in-depth guide which shows an example of a setup. Due to these tools I am using are not developed by me, I can really only show you the reader how I set everything up.
If your setup differs from mine or you prefer to make changes, please follow the appropriate instructions. When working on something involved I like observing a complete example for sometimes instructions tend to miss things.
If I have missed anything or there are things that you would like me to include in my guides, please don’t hesitate to contact me.
Downloading Installer
To get MSYS2 setup, start by downloading the 64-Bit Installer Binaries
I chose msys2-x86_64-20161025.exe.
Installation Restrictions
The version of MSYS2 that I’m using has the following restrictions:
- MSYS2 cannot be installed on FAT* partitions.
- Current MSYS2 cannot be installed on Windows XP.
MSYS2 Installation Wizard
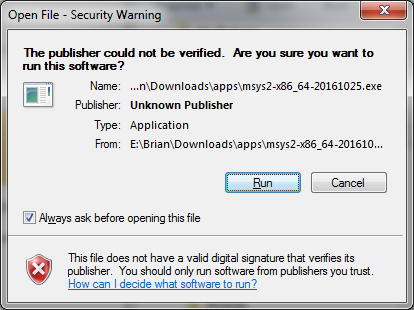
After saving msys2-x86_64-20161025.exe to disk, run the executable.
When I ran the executable, I got an OpeFile Security Warning from Windows. Simply select Run.
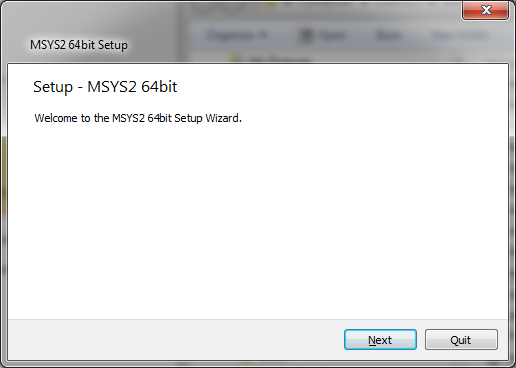
You are greeted with a simple Welcome screen. Select Next.
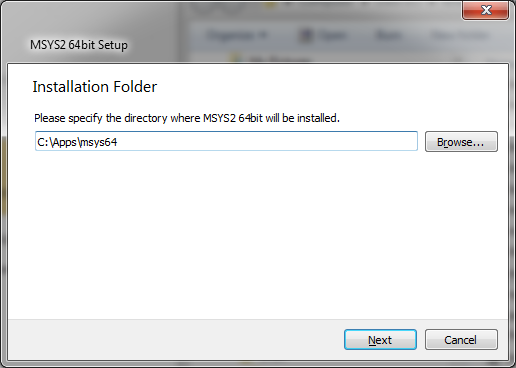
Choose the Installation Folder. They make it explicitly clear in the documentation that you must use folder names that consist of only ascii characters and no spaces. They also recommend not to have too many characters in the path due to maximum path length in Windows being 2601.
I have chosen C:\Apps\msys64.
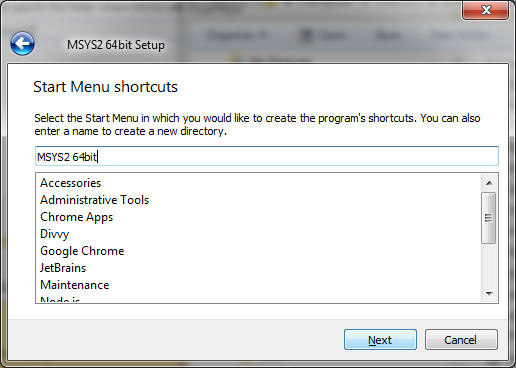
The Wizard asks for a Start Menu shortcut. I left the default which was MSYS2 64bit.
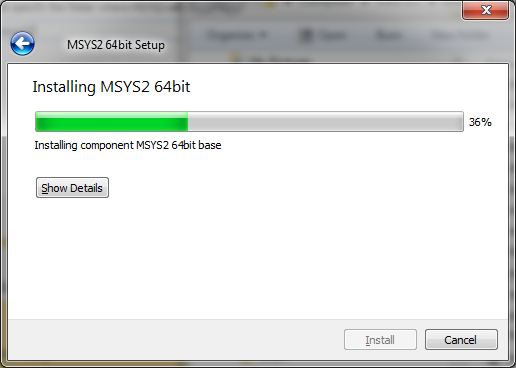
Installation took between 30-60 seconds.
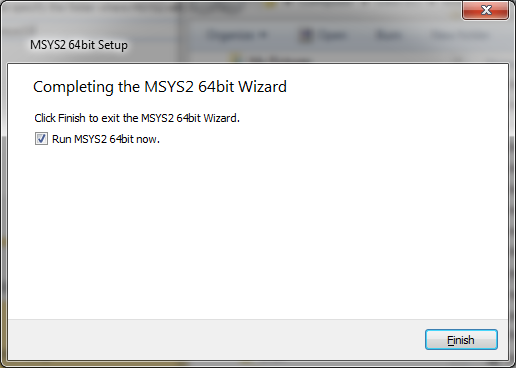
When complete, it gives you the option to Run MSYS2 64bit now. I left it checked and selected Finish.
TODO(bk): What happens if you don’t choose this option?
Very briefly a console window appears and disapears, and another is created. This is MinTTY, the default bash shell.
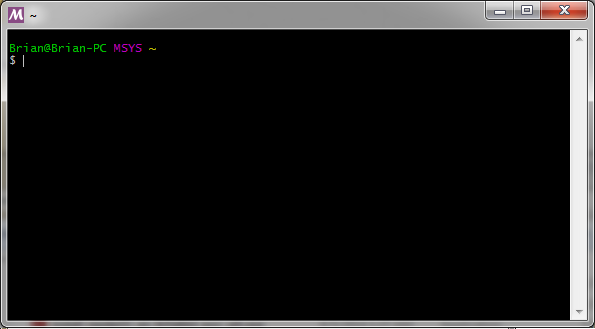
Type exit to quit.
Before continuing on with the installation, I want to make a change to the installation directory structure.
Creating a junction to /home/<user> directory
If you are familiar with the Unix or Linux directory structure, you will find that the MSYS2 installation will put all files within the installation path; which, I stated above I used C:\Apps\msys64.
Open a regular Command Prompt and after navigating to this directory, running dir /ad /b shows the following directories which were created during installation.
dev/
etc/
home/
mingw32/
mingw64/
tmp/
usr/
var/
I prefer moving my home directory /home/Brian to a different location and setup a junction to the directory.
It should be noted that if you uninstall MSYS2, part of the installation will remove all of your installation directory, thus it will include your home directory.
To create a junction, within CMD, navigate to the home directory.
cd C:\Apps\msys64\home
If you look at the current files of the directory, they are your profile and bash configuration files.
C:\Apps\msys64\home>dir /s /b
C:\Apps\msys64\home\Brian
C:\Apps\msys64\home\Brian\.bashrc
C:\Apps\msys64\home\Brian\.bash_history
C:\Apps\msys64\home\Brian\.bash_logout
C:\Apps\msys64\home\Brian\.bash_profile
C:\Apps\msys64\home\Brian\.inputrc
C:\Apps\msys64\home\Brian\.profile
Let’s move this directory to where we want to have my home directory. I have three harddrives in my system, with both C and D being SSDs. However, my C drive has twice the space of D so for now, I will keepy my home directory on C.
Due to me wanting to create directories if they don’t exist, I will use robocopy and its /MOVE option.
C:\Apps\msys64\home>robocopy Brian C:\slash\home\Brian /MOVE

-------------------------------------------------------------------------------
   ROBOCOPY     ::     Robust File Copy for Windows

-------------------------------------------------------------------------------

  Started : Sat Jul 29 15:18:48 2017

   Source : C:\Apps\msys64\home\Brian\
     Dest : C:\slash\home\Brian\

    Files : *.*

  Options : *.* /COPY:DAT /MOVE /R:1000000 /W:30

------------------------------------------------------------------------------

          New Dir          6    C:\Apps\msys64\home\Brian\
100%        New File                   5        .bash_history
100%        New File                  21        .bash_logout
100%        New File                1255        .bash_profile
100%        New File                5827        .bashrc
100%        New File                3272        .inputrc
100%        New File                1574        .profile

------------------------------------------------------------------------------

               Total    Copied   Skipped  Mismatch    FAILED    Extras
    Dirs :         1         1         0         0         0         0
   Files :         6         6         0         0         0         0
   Bytes :    11.6 k    11.6 k         0         0         0         0
   Times :   0:00:00   0:00:00                       0:00:00   0:00:00


   Speed :              385612 Bytes/sec.
   Speed :              22.064 MegaBytes/min.

   Ended : Sat Jul 29 15:18:48 2017
Now, we can create a junction to this directory.
mklink /J Brian C:\slash\home\Brian
C:\Apps\msys64\home>mklink /J Brian C:\slash\home\Brian
Junction created for Brian <<===>> C:\slash\home\Brian

C:\Apps\msys64\home>dir
 Volume in drive C has no label.
 Volume Serial Number is F8A3-5919

 Directory of C:\Apps\msys64\home

07/29/2017  03:33 PM    <DIR>          .
07/29/2017  03:33 PM    <DIR>          ..
07/29/2017  03:32 PM    <JUNCTION>     Brian [C:\slash\home\Brian]
               0 File(s)              0 bytes
               3 Dir(s)  85,656,752,128 bytes free
For those who are more familiar with ln, the link and target in mklink are opposite.
Aside: MSYS2 does not fully support creating symlinks / junctions
An aside, another thing to note is that though Linux supports symlinks and hard links, unless you make changes to how mintty is started and run as Administrator, this is not a fully supported feature. You can do it through a windows CMD prompt and Mintty will see that the junction or symlink exists.
If you run ln -s target link in mintty, it will “work” in that it will copy all the files from your target folder to the link. However, that is probably not what we want.
Restrict access to /home/Brian/ - Using icacls
Because I did not put my home directory within my Users directory, as in C:\Users\Brian, creating a directory as what was done in the previous step would use the default permission. Unless you or your administrator has changed the policy, by default everyone who has access to the machine will be able to view these files.
We can easily see this by using icacls.
C:\Apps\msys64\home>cd C:\slash\home

C:\slash\home>icacls Brian
Brian BUILTIN\Administrators:(I)(F)
      BUILTIN\Administrators:(I)(OI)(CI)(IO)(F)
      NT AUTHORITY\SYSTEM:(I)(F)
      NT AUTHORITY\SYSTEM:(I)(OI)(CI)(IO)(F)
      BUILTIN\Users:(I)(OI)(CI)(RX)
      NT AUTHORITY\Authenticated Users:(I)(M)
      NT AUTHORITY\Authenticated Users:(I)(OI)(CI)(IO)(M)

Successfully processed 1 files; Failed processing 0 files

C:\slash\home>icacls Brian\.bash_history
Brian\.bash_history BUILTIN\Administrators:(I)(F)
                    NT AUTHORITY\SYSTEM:(I)(F)
                    BUILTIN\Users:(I)(RX)
                    NT AUTHORITY\Authenticated Users:(I)(M)

Successfully processed 1 files; Failed processing 0 files
From just taking a glance at the list, anyone who belongs to Users or Authenticated Users will have access, along with Administrators.
Permission |
Description |
|---|---|
| (F) | Full access |
| (M) | Modify access |
| (RX) | Read and Execute access |
| (I) | Permission inherited from parent container |
| (OI) | object inherit (objects would be files and links) |
| (CI) | container inherit (as in directories) |
| (IO) | inherit only |
| ———————– | ————————————————— |
We can change this running the following:
icacls Brian /inheritance:r /grant:r Administrators:(OI)(CI)(IO)F^
 /grant:r Administrators:F /grant:r Brian:(OI)(CI)(IO)F /grant:r Brian:F /T
Note: The ^ at the end of the first line means this is a multi-line command.
Parameter |
Description |
|---|---|
| /T | Recursive mode. Performs the operation on all specified files in the |
| current directory and its subdirectories. | |
| /grant[:r] | Grants specified user access rights. Permissions replace previously |
| granted explicit permissions. | |
| Without :r, permissions are added to any previously | |
| granted explicit permissions. | |
| /inheritance:r | Remove all inherited ACEs |
| ———————- | ———————————————————————— |
And running the command it successfully updates the directory and all files within.
C:\slash\home>icacls Brian /inheritance:r /grant:r Administrators:(OI)(CI)(IO)F
/grant:r Administrators:F /grant:r Brian:(OI)(CI)(IO)F /grant:r Brian:F /T
processed file: Brian
processed file: Brian\.bashrc
processed file: Brian\.bash_history
processed file: Brian\.bash_logout
processed file: Brian\.bash_profile
processed file: Brian\.inputrc
processed file: Brian\.minttyrc
processed file: Brian\.profile
Successfully processed 8 files; Failed processing 0 files
And now when we view the permissions, only me, Brian and Administrators have permission. Technically you could just grant yourself, but any admin could just grant themselves access at any point.
C:\slash\home>icacls Brian
Brian Brian-PC\Brian:(F)
      BUILTIN\Administrators:(F)
      Brian-PC\Brian:(OI)(CI)(IO)(F)
      BUILTIN\Administrators:(OI)(CI)(IO)(F)

Successfully processed 1 files; Failed processing 0 files

C:\slash\home>icacls Brian\.bash_history
Brian\.bash_history Brian-PC\Brian:(F)
                    BUILTIN\Administrators:(F)

Successfully processed 1 files; Failed processing 0 files
It should be noted that any new file created within this directory will inherit these permissions.
Adding an icon for MSYS2’s shortcuts
Not being a fan of the batch icon that is used by default for MSYS2 shortcuts, I like updating it to MSYS2’s icon.
Within the Windows Start Menu, navigate to your MSYS2 folder (or simply use the search).
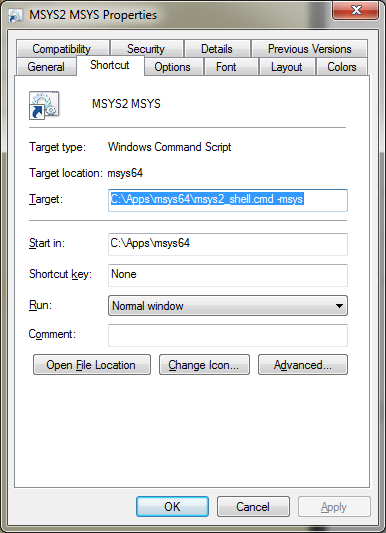
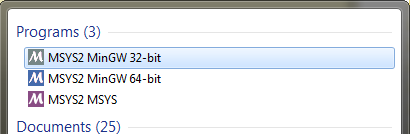
All three shortcuts call the same batch file msys2_shell.cmd, just with a different argument to specify the subsystem.
| MSYS2 MinGW 32-bit: | C:\Apps\msys64\msys2_shell.cmd -mingw32 |
| MSYS2 MinGW 64-bit: | C:\Apps\msys64\msys2_shell.cmd -mingw64 |
| MSYS2 MSYS: | C:\Apps\msys64\msys2_shell.cmd -msys |
![]()
Right click on the shortcut of the one you want to change the icon, and select properties. I will be changing all three.
Choose Change Icon….
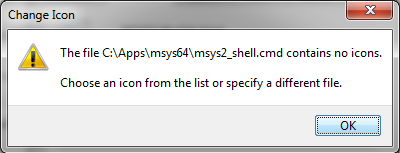
You will get a pop-up telling you that it contains no icons. Simply select OK.
You are welcome to choose whichever icon you prefer. If you want to navigate to a specific location, just press Browse….
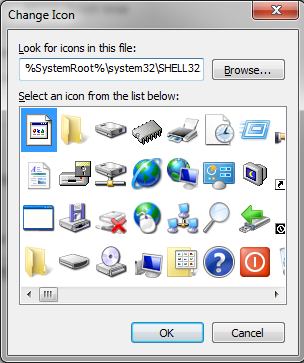
I Like the ones that MSYS2 provides, so navigating to C:\Apps\msys64 I can choose one of three different colours.
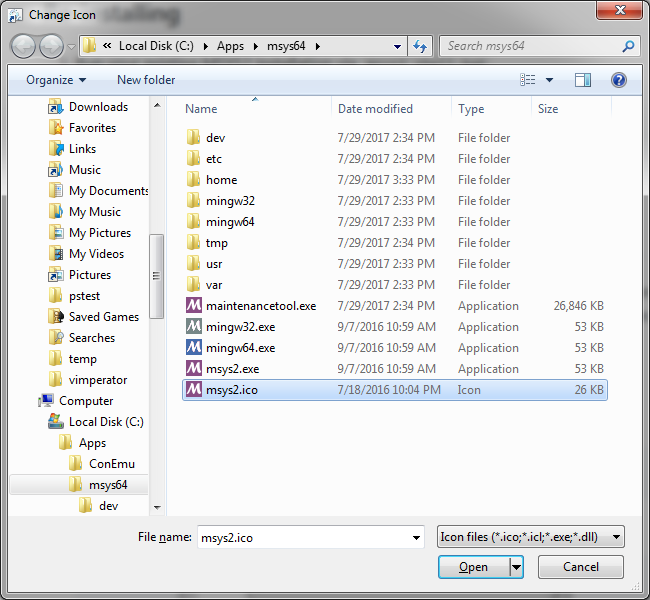
Select the program with the icon of which you prefer. You don’t need to choose an .ico file for Windows will use the icon from other applications.
Due to each having their own colour, I will keep to the colour scheme. For MSYS2 shortcut I chose msys2.ico.
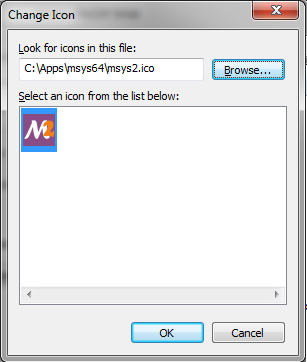
After choosing the file, select open and Ok to close the properties window. You can do it to the other two shortcuts if you wish.
And this is how they look when completed.
Add exception to Anti-malware/virus programs
Before we actually execute pacman, we need to make sure that any anti-virus/malware/etc has an exception on the file. If we don’t, the program could potentially block it while it is running and updating its database. If this happens it will corrupt the database and you will need to restart.
I know from unfortunate personal experience this happens with Malwarebytes Premium. I am not sure about other programs so either add the exception, or look into your software to see if needed.
Note: I am only adding the exception to Malwarebytes for I’ve run into issues with it. Since we will be adding a way of backing up and restore our system I figure it’s better to only add exclusions if we need it.
I realize that I am assuming that pacman is safe. There are methods of verifying if a particular file is safe. I found this link which specifically was a response about Malwarebytes and pacman.
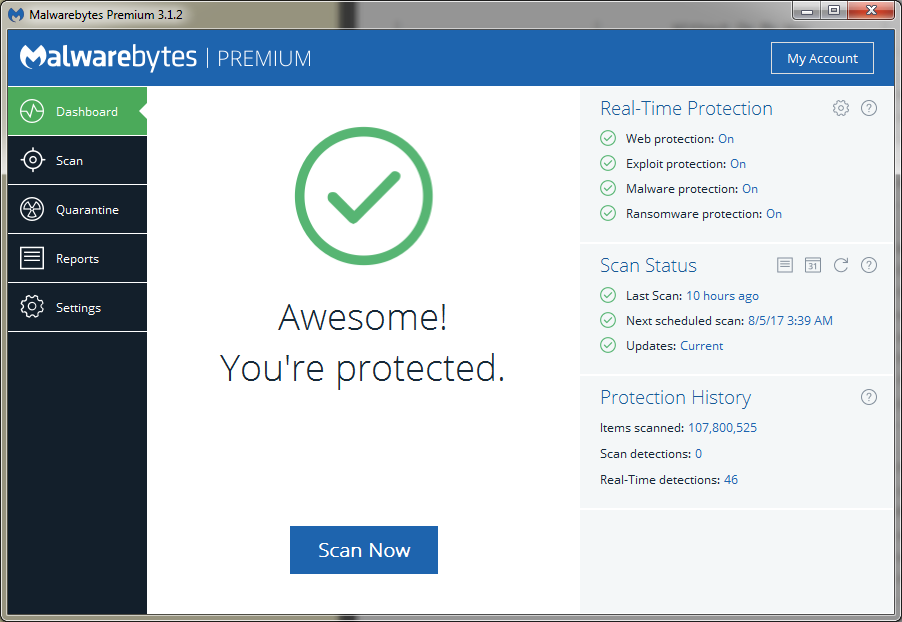
For Malwarebytes, let’s add pacman as an exception. First let’s open the Malwarebytes dashboard.
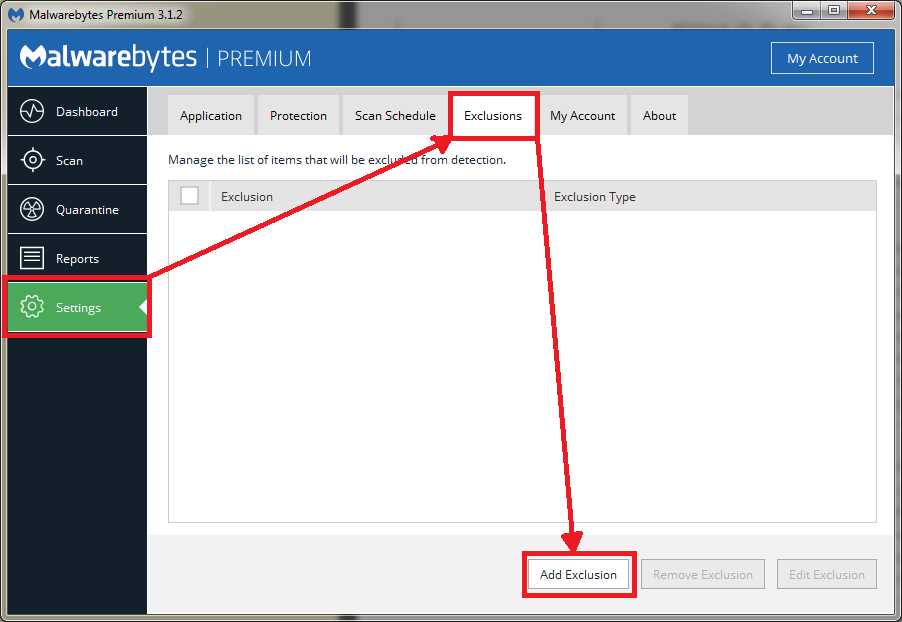
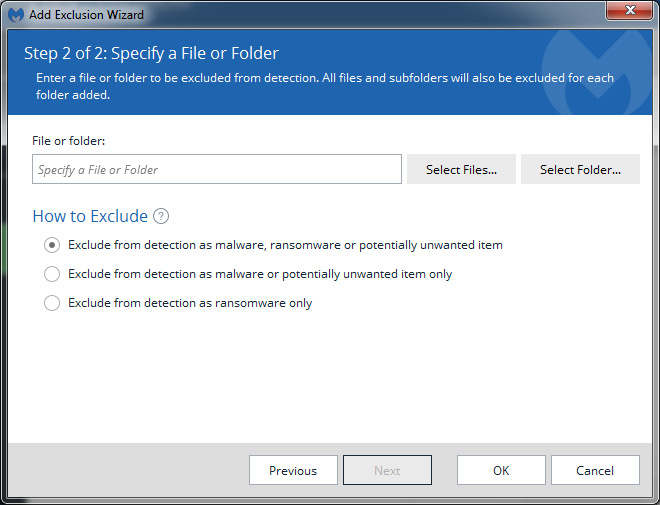
Select Settings tab and within Settings, select Exclusions. Let’s add an exclusion by simply pressing Add Exclusion.
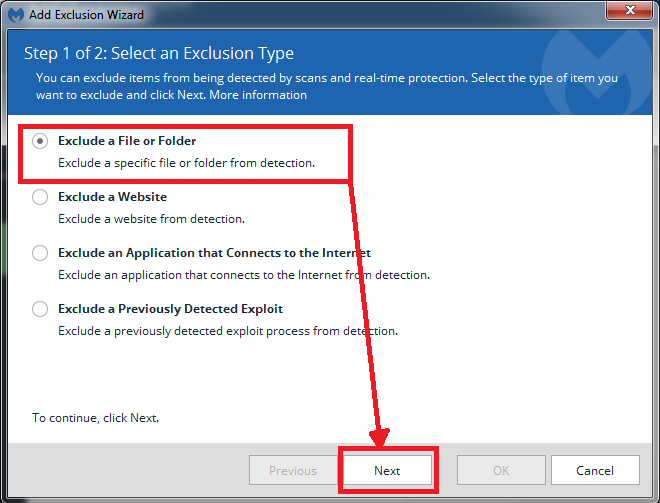
Choose Exclude a File or Folder and select Next.
We want to select Exclude from detection as malware, ransomware or potentially unwanted item.
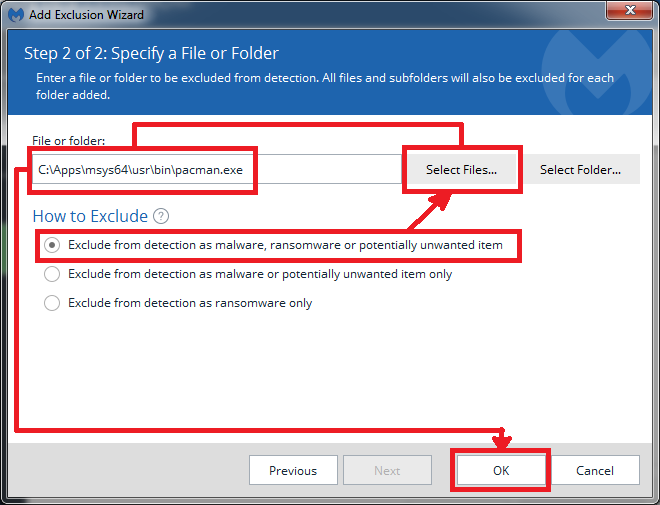
Press Select Files… and navigate to where pacman is located. Mine was located C:\Apps\msys64\usr\bin\pacman.exe
Select OK when ready.
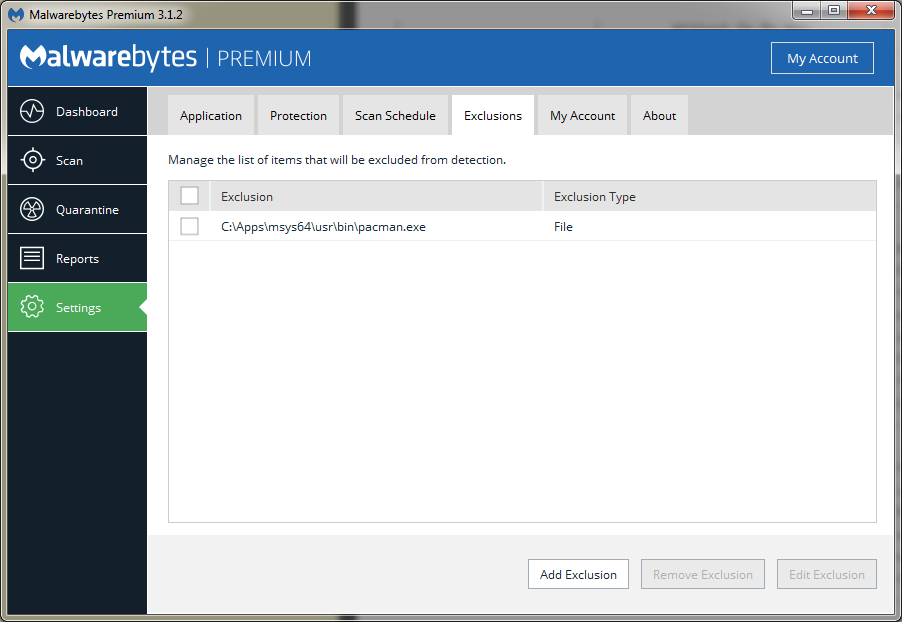
We now have pacman as an exclusion.
Continuing installation - Updating package database and core system packages
To continue, we need to sync all the needed packages locally. We can do this with MSYS2’s package manager: pacman.
MSYS2’s documentation says to use the msys2 subsystem for running pacman though I am not entirely sure why. I used whatever shell I was in to run pacman and did not run into problems2. If you know why they recommend using the msys2, please contact me and I can add it to this documentation. I would also love to understand.
Open MSYS2 shortcut.
Run pacman -Sy to get the latest package information from the server.
Brian@Brian-PC MSYS ~
$ pacman -Sy
:: Synchronizing package databases...
 mingw32                                               343.9 KiB   579K/s 00:01 [#############] 100%
 mingw32.sig                                            96.0   B  0.00B/s 00:00 [#############] 100%
 mingw64                                               344.0 KiB   791K/s 00:00 [#############] 100%
 mingw64.sig                                            96.0   B  0.00B/s 00:00 [#############] 100%
 msys                                                  151.4 KiB   742K/s 00:00 [#############] 100%
 msys.sig                                               96.0   B  0.00B/s 00:00 [#############] 100%
Now we need to update the core packages. pacman --needed -S bash pacman pacman-mirrors msys2-runtime.
Brian@Brian-PC MSYS ~
$ pacman --needed -S bash pacman pacman-mirrors msys2-runtime
warning: pacman-mirrors-20160112-1 is up to date -- skipping
resolving dependencies...
looking for conflicting packages...

Packages (3) bash-4.4.012-1  msys2-runtime-2.8.2-1  pacman-5.0.1-3

Total Installed Size:  50.06 MiB
Net Upgrade Size:      -1.14 MiB

:: Proceed with installation? [Y/n]
Hit enter to continue.
:: Proceed with installation? [Y/n]
(3/3) checking keys in keyring                                                  [#############] 100%
(3/3) checking package integrity                                                [#############] 100%
(3/3) loading package files                                                     [#############] 100%
(3/3) checking for file conflicts                                               [#############] 100%
(3/3) checking available disk space                                             [#############] 100%
:: Processing package changes...
(1/3) upgrading msys2-runtime                                                   [#############] 100%
(2/3) upgrading bash                                                            [#############] 100%
(3/3) upgrading pacman                                                          [#############] 100%

Brian@Brian-PC MSYS ~
$
As expected, we received updates.
What was unexpected was other times when I’ve upgraded these files, I would receive a warning about not returning to bash and exit immediately.
Anyway, kill the mintty.exe process and re-launch the MSYS2 shell. I show using the command prompt:
C:\Apps\msys64>taskkill /IM mintty.exe /T
SUCCESS: Sent termination signal to process with PID 8700, child of PID 8984.
Note: I am assuming that the only process named mintty.exe running is what I expect. If you prefer to play it safe, you can get the Process ID (PID) and kill that.
C:\Apps\msys64>wmic process get processid,executablepath | findstr "msys64"
C:\Apps\msys64\usr\bin\mintty.exe                    8700
C:\Apps\msys64\usr\bin\bash.exe                      12532
Killing mintty.exe should kill bash.exe as well using the /T argument, even if they are not listed as a child.
Re-launching MSYS2, I re-run pacman --needed -S bash pacman pacman-mirrors msys2-runtime to make sure everything is up to date.
Brian@Brian-PC MSYS ~
$ pacman --needed -S bash pacman pacman-mirrors msys2-runtime
warning: bash-4.4.012-1 is up to date -- skipping
warning: pacman-5.0.1-3 is up to date -- skipping
warning: pacman-mirrors-20160112-1 is up to date -- skipping
warning: msys2-runtime-2.8.2-1 is up to date -- skipping
 there is nothing to do
Updating the remaining packages.
Now we can update the rest of our packages, simply by running pacman --needed -Suu and hitting enter to proceed. If you prefer to just update whatever without needing to confirm, you can always add --noconfirm and it will automatically assume Yes, you want to proceed.
Brian@Brian-PC MSYS ~
$ pacman --needed -Suu
:: Starting core system upgrade...
warning: terminate other MSYS2 programs before proceeding
resolving dependencies...
looking for conflicting packages...

Packages (2) filesystem-2017.05-1  mintty-1~2.7.7-1

Total Installed Size:  0.50 MiB
Net Upgrade Size:      0.10 MiB

:: Proceed with installation? [Y/n]
(2/2) checking keys in keyring                                                  [#############] 100%
(2/2) checking package integrity                                                [#############] 100%
(2/2) loading package files                                                     [#############] 100%
(2/2) checking for file conflicts                                               [#############] 100%
(2/2) checking available disk space                                             [#############] 100%
warning: could not get file information for opt/
:: Processing package changes...
(1/2) upgrading filesystem                                                      [#############] 100%
(2/2) upgrading mintty                                                          [#############] 100%
warning: terminate MSYS2 without returning to shell and check for updates again
warning: for example close your terminal window instead of calling exit
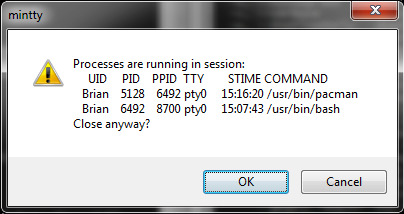
Again, kill the process (ie taskkill /IM mintty.exe /T from CMD) and re-launch MSYS2.
This time however, you will get a pop-up since processes are running. Select OK.
If you prefer to just kill and don’t care about confirmation, you could add /F argument when you execute taskkill.
After re-launching MSYS2 again, re-run pacman --needed -Suu. We will continue to do this until all packages are updated.
Brian@Brian-PC MSYS ~
$ pacman --needed -Suu
:: Starting core system upgrade...
 there is nothing to do
:: Starting full system upgrade...
resolving dependencies...
looking for conflicting packages...

Packages (52) bash-completion-2.5-1  bsdcpio-3.3.1-1  bsdtar-3.3.1-1  coreutils-8.26-1  crypt-1.4-1  curl-7.54.0-1  file-5.30-1
              flex-2.6.4-1  gawk-4.1.4-2  gcc-libs-6.3.0-1  gettext-0.19.8.1-1  gmp-6.1.2-1  gnupg-1.4.21-3  grep-3.0-1  icu-59.1-1
              inetutils-1.9.4-1  info-6.3-1  libarchive-3.3.1-1  libasprintf-0.19.8.1-1  libassuan-2.4.3-1  libcrypt-1.4-1
              libcurl-7.54.0-1  libedit-3.1-20170329  libexpat-2.2.0-2  libgettextpo-0.19.8.1-1  libgpg-error-1.27-1
              libintl-0.19.8.1-1  liblzma-5.2.3-1  liblzo2-2.10-1  libmetalink-0.1.3-1  libopenssl-1.0.2.k-1  libpcre-8.40-2
              libpcre16-8.40-2  libpcre32-8.40-2  libpcrecpp-8.40-2  libpcreposix-8.40-2  libreadline-7.0.003-1
              libsqlite-3.19.3.0-1  libtasn1-4.10-1  libxml2-2.9.2-3  m4-1.4.18-1  mpfr-3.1.5.1-3  ncurses-6.0.20170708-2
              openssl-1.0.2.k-1  pax-git-20161104.2-1  pcre-8.40-2  pkgfile-17-1  sed-4.4-2  tzcode-2017.b-1  wget-1.19.1-1
              xz-5.2.3-1  zlib-1.2.11-1

Total Installed Size:  126.44 MiB
Net Upgrade Size:        4.04 MiB

:: Proceed with installation? [Y/n]
(52/52) checking keys in keyring                                                [#############] 100%
(52/52) checking package integrity                                              [#############] 100%
(52/52) loading package files                                                   [#############] 100%
(52/52) checking for file conflicts                                             [#############] 100%
(52/52) checking available disk space                                           [#############] 100%
:: Processing package changes...
( 1/52) upgrading bash-completion                                               [#############] 100%
( 2/52) upgrading gcc-libs                                                      [#############] 100%
( 3/52) upgrading libintl                                                       [#############] 100%
( 4/52) upgrading libgettextpo                                                  [#############] 100%
( 5/52) upgrading libasprintf                                                   [#############] 100%
( 6/52) upgrading gettext                                                       [#############] 100%
( 7/52) upgrading liblzma                                                       [#############] 100%
( 8/52) upgrading liblzo2                                                       [#############] 100%
( 9/52) upgrading gmp                                                           [#############] 100%
(10/52) upgrading coreutils                                                     [#############] 100%
(11/52) upgrading ncurses                                                       [#############] 100%
(12/52) upgrading libreadline                                                   [#############] 100%
(13/52) upgrading zlib                                                          [#############] 100%
(14/52) upgrading libxml2                                                       [#############] 100%
(15/52) upgrading bsdcpio                                                       [#############] 100%
(16/52) upgrading bsdtar                                                        [#############] 100%
(17/52) upgrading libcrypt                                                      [#############] 100%
(18/52) upgrading crypt                                                         [#############] 100%
(19/52) upgrading libexpat                                                      [#############] 100%
(20/52) upgrading libmetalink                                                   [#############] 100%
(21/52) upgrading libopenssl                                                    [#############] 100%
(22/52) upgrading openssl                                                       [#############] 100%
(23/52) upgrading sed                                                           [#############] 100%
(24/52) upgrading libpcre                                                       [#############] 100%
(25/52) upgrading info                                                          [#############] 100%
(26/52) upgrading libtasn1                                                      [#############] 100%
(27/52) upgrading libedit                                                       [#############] 100%
(28/52) upgrading icu                                                           [#############] 100%
(29/52) upgrading libsqlite                                                     [#############] 100%
(30/52) upgrading libcurl                                                       [#############] 100%
(31/52) upgrading curl                                                          [#############] 100%
(32/52) upgrading file                                                          [#############] 100%
(33/52) upgrading m4                                                            [#############] 100%
(34/52) upgrading flex                                                          [#############] 100%
(35/52) upgrading mpfr                                                          [#############] 100%
(36/52) upgrading gawk                                                          [#############] 100%
(37/52) upgrading gnupg                                                         [#############] 100%
gpg: /etc/pacman.d/gnupg/trustdb.gpg: trustdb created
gpg: no ultimately trusted keys found
gpg: Generating pacman keyring master key...
gpg: skipping control `%no-protection' ()
.+++++
+++++
gpg: key A4E7747A marked as ultimately trusted
gpg: Done
==> Updating trust database...
gpg: 3 marginal(s) needed, 1 complete(s) needed, PGP trust model
gpg: depth: 0  valid:   1  signed:   0  trust: 0-, 0q, 0n, 0m, 0f, 1u
==> Appending keys from msys2.gpg...
gpg: 3 marginal(s) needed, 1 complete(s) needed, PGP trust model
gpg: depth: 0  valid:   1  signed:   0  trust: 0-, 0q, 0n, 0m, 0f, 1u
==> Locally signing trusted keys in keyring...
  -> Locally signing key D55E7A6D7CE9BA1587C0ACACF40D263ECA25678A...
  -> Locally signing key 123D4D51A1793859C2BE916BBBE514E53E0D0813...
  -> Locally signing key B91BCF3303284BF90CC043CA9F418C233E652008...
  -> Locally signing key 9DD0D4217D75A33B896159E6DA7EF2ABAEEA755C...
==> Importing owner trust values...
gpg: setting ownertrust to 4
gpg: setting ownertrust to 4
gpg: setting ownertrust to 4
gpg: inserting ownertrust of 4
==> Updating trust database...
gpg: 3 marginal(s) needed, 1 complete(s) needed, PGP trust model
gpg: depth: 0  valid:   1  signed:   4  trust: 0-, 0q, 0n, 0m, 0f, 1u
gpg: depth: 1  valid:   4  signed:   3  trust: 0-, 0q, 0n, 4m, 0f, 0u
gpg: depth: 2  valid:   3  signed:   0  trust: 3-, 0q, 0n, 0m, 0f, 0u
(38/52) upgrading grep                                                          [#############] 100%
(39/52) upgrading inetutils                                                     [#############] 100%
(40/52) upgrading libarchive                                                    [#############] 100%
(41/52) upgrading libgpg-error                                                  [#############] 100%
(42/52) upgrading libassuan                                                     [#############] 100%
(43/52) upgrading libpcre16                                                     [#############] 100%
(44/52) upgrading libpcre32                                                     [#############] 100%
(45/52) upgrading libpcrecpp                                                    [#############] 100%
(46/52) upgrading libpcreposix                                                  [#############] 100%
(47/52) upgrading pax-git                                                       [#############] 100%
(48/52) upgrading pcre                                                          [#############] 100%
(49/52) upgrading xz                                                            [#############] 100%
(50/52) upgrading pkgfile                                                       [#############] 100%
(51/52) upgrading tzcode                                                        [#############] 100%
(52/52) upgrading wget                                                          [#############] 100%
And simply running it again shows that indeed, everything is up to date.
Brian@Brian-PC MSYS ~
$ pacman --needed -Suu
:: Starting core system upgrade...
 there is nothing to do
:: Starting full system upgrade...
 there is nothing to do
Installation Complete
Our installation of MSYS2 is complete. Next we will be setting up our development environment using pacman to install the required packages.
Please let me know if you ran into any issues with the installation.
- Maximum Path Length Limitations is defined by MAX_PATH in the Windows API and is 260 characters. The Unicode version has an extended-length path for a maximum of 32,767 characters. To specify an extended-length path, use the
\\?\prefix. [return] - I never had issues with pacman itself. But malwarebytes thought that
pacmanwas ransomware and held most of the/usr/bindirectory hostage… [return]